Feeds:
Posts
Comments

Archive for the ‘During’ Category

I’ve been excited to share this project with you for MONTHS. No, it hasn’t been done for months, it’s been done for about five minutes. The closing ceremonies are on Sunday, so I kind-of waited until the last minute to actually do this project… but it’s been in my head for months.

Oh gosh, do those wheels make me happy.

As you know, we’ve been working on Kenton’s “big boy” room. It is going to have a cycling theme. So, I’ve been tossing around different ideas using bike parts in the room. I got this idea a while back and Jason initially tried to talk me out of it. Where would I get bike wheels? You’ll have to buy a whole bike (three bikes!) and just use the wheels? This could get expensive, quick. Yikes!

So, imagine my DELIGHT when I stumbled upon these beauties at my local thrift store…

Three bikes. $4.99 each. WHAT?! I know. You know what’s even better? I had a $10 off coupon. So, I got all three bikes for $5. YESITSTRUE. They all happen to be the same brand and size. The gal at the register guessed I was pregnant with triplet girls. I quite enjoyed telling here there was just one baby in my belly and these bikes were about to get stripped for an art project for my son’s room. Yep, she was confused.

I got home and could barely contain my excitement as I showed Jason what I found. He was impressed! You need to understand, Jason is a cyclist. but not only does he ride a bike for exercise and fun – it’s also his main hobby. He loves scouring eBay for deals on bikes and bike parts. Many times, he’s purchased incredible bikes for way below retail, stripped them and re-sold the parts via eBay for a hefty profit. We have an ongoing agreement… I don’t care if he spends $2,000, $3,000 or even $5,000 on a bike if he’s sure he can turn a profit off of it. He always does.

So, I had the right guy on my team to strip these girls down to just what I needed.

bike guts

6th wheel

That, my friends is the 6th wheel. I’m saving her for another fun project in the room – but you can see there the toughest parts to remove (thanks to rusty bolts) – the axel, bearings and cog. Once Jason was able to get those off, there was a ton of grease in that middle hole. We spent a couple of days going through cycles of spraying them down with degreaser, wiping, rinsing, letting them dry – before we felt they were ready for the next step…

The first step, once the wheels are successfully naked from all unnecessary parts, spray them down with primer.

Once they’re dry, which takes no time at all here in Arizona, you’re ready to apply the individual ring colors.

Since the Olympic colors are not colors I’m using anywhere else in this room, I opted for Krylon’s Short Cuts, mini spray paint cans:

Aren’t they cute?

Krylon, by the way, didn’t pay me for this post. I just researched spray paint and thought this product would be best. It worked out well. I had more than enough paint for each wheel. I also shopped around for the best price on these puppies, which I found at Hobby Lobby:

Two of the colors were $3.47 and the other three were $3.27. Not sure why red and yellow were more expensive, but still – that was the best price I found.

So, the obvious next step is to start painting the wheels/rings…

The front/back was easy. The sides, however, were a little tricky. At first, I thought the middle hole would fit over a wine or beer bottle, but they were a little small. So, I jerry-rigged three beer bottles through the spokes to hold the wheels just far enough off the ground that I could spray the entire side in one try.

Bonus – after, you have artsy painted beer bottles (which went straight back into the recycling bin!).

With all sides of the wheels painted…

I let them dry for a few hours. Again, the Arizona summer “dry” heat is fantastic for fast drying. It’s not fantastic for late-term pregnancy, but I digress.

Once they were ready, we did a quick Google image consult to check the proper order… then we simply nailed them to the wall, really close together.

Since Kenton’s big boy room is not ready for these rings yet, they are being temporarily housed in the playroom. Before we move them, we’ll be looking at different methods of hanging. This isn’t necessarily the most secure – especially for a curious little boy! Anyway, here’s what they look like right now in the playroom… so you can see the size….

Yes, that’s my little “Made in the USA” future Olympian down there chasing a ball…

We’re hoping he goes for the gold someday in cycling – but his current obsession with balls may indicate another sport interest. We shall see.

Okay, here’s the budget breakdown for this project:

Bikes = $5 ($4.99 each with a $10 off coupon)

Spray paint primer = Already had

Mini spray paints = $16.75

TOTAL = $21.75

Crazy, right?!

What do you think?! Anybody else do an Olympic-theme DIY project this week?

Read Full Post »

I cannot believe my baby is almost one! I literally broke into tears yesterday at 9:00 AM, because my water broke at that time on Memorial Day last year. Ahh, memories!

Kenton’s birthday is on Thursday and his party is on Saturday. So, it’s BIRTHDAY week on the blog! Hope you like cute blonde baby boys and mustaches. 🙂

The invitations have gone out and we’re having a mustache party! I’ll share all the details soon… Right now, I’m busy getting ready…

I’m making bunting. Cutting more mustaches than I ever imagined. Finalizing the menu. Cleaning (HA! Called back the cleaners I had to fire for one last hurrah!). Oh, and we’re frantically trying to finish our big painting project…

Can you see me and my baby bump in this really terrible, unedited photo?!

Thank you for all of the tips and suggestions you gave in answer to my cry for help last week. We finally figured it out – after much cursing and gnashing of teeth. The lines are straight and the paint is drying – we still need a second coat and it’s a HUGE bummer that Jason’s back decided to give out before the job was done. So, that’s going to be interesting! But, we will get it done – even if I have to cover it in mustaches.

Read Full Post »

Gallery Wall

The gallery wall is complete!

Which means the wedding wall is gone…

I did let one photo stay! 🙂

I’ve tried a gallery wall before – in our rental house. It looked really bad. This time, I took my time and really worked on it to make sure it was exactly what I wanted. I followed the Young House Love tutorial on gallery wall-ing, which includes putting trash on your wall…

Seriously.

The wall looked like this for more than a week. It went through several variations (five, I think) before it was just right. Having exact cutouts of the gallery wall frames was incredibly helpful! The hubs loved that I could play with the arrangement without putting multiple holes in the wall.

Once I had the arrangement just right, I arranged the frames on the floor – just to see how they looked and make sure I liked how things were coming together…

I was happy! So, I moved forward with measuring just where each nail would go and nailing through the paper first. Then, hanging each piece and making sure it was perfectly centered on the paper.

Once everything was set, Jason spray painted the non-white frames for me (trying to obey the do’s/don’t’s of pregnancy!).

Jason did a coat of primer and two coats of a high-gloss white paint on each frame. In hindsight, I should have done a matte finish, not gloss – but it’s not a huge deal. Now that the frames were the right color, it was time to pick the right photos or artwork for each one.

That’s not my baby.

Nope. That’s a baby I picked up at a thrift store for $2. Not the baby, obviously, but the frame. I could tell the frame would paint well and the price was right, so I snagged it. I thought the image was an advertisement. Nope! When I took it out of the frame, I saw it was a real photo of someone’s baby…

That’s what was on the back of the photo. How sad is that?! Someone donated their newborn’s photo to a thrift shop. In true ex-reporter fashion, I did a little digging to see if I could find anything on Miss Alexis – but nothing turned up. Guess she’s still too young for Google searches. So, I tossed the photo. Wasn’t that attached to the story. 🙂 It was replaced with one of the state maps I got for free from this site.

Working clockwise from top, left – here is what I included in the gallery frames…

1) Maine map: The state where Jason and I met, fell in love and got engaged. It’s also where he grew up and the only other state he’s lived in.

2) Pray art: I picked this piece up at the Junk in the Trunk sale, from my friend’s company – The Red Dutch Door.

3) Wedding photo!

4) Baby photo! Sweet shot of our sweet boy taken during our 2011 family photo shoot. I think the colors tie in perfectly with the rest of the wall. Here’s a closer look:

5) Fabric: I picked up the frame at the Junk in the Trunk sale and put some fabric in it that will soon be in the master bedroom. It’s also the same print, but different colors as a framed fabric in the new playroom.

6) The one wedding photo that got to stay from the wedding wall.

7) Arizona map: The state where Jason and I were married, started our life together, bought our first home, and had our first bambino! Hopefully, it goes without saying – this is also where we live now.

8) Sweet photo of Kenton’s baby hand grasping Jason’s ring finger – also from the 2011 family photo shoot. There’s a glare on that shot above, so here’s a better look:

9) Awesome shot of our “first baby” – our Bulldog, Bowdoin when he was a puppy.

10) A poem that I spotted on Pinterest and recreated myself – but it’s a work in progress and I’ll be tweaking it. Here’s a closer look:

11) An “F” for our last name.

Finally, the budget-breakdown:

$4.92 – prints at Walmart for #’s 4 and 8.

$8.00 – “Pray” framed piece

$6.50 – for the frame holding the fabric

$4.26 – white spray paint (which I will also be using for other projects)

Everything else I either already had or was free!

TOTAL = $23.68

That’s it! That is the story behind our gallery wall. What do you think? Did it turn out okay?

Read Full Post »

We are changing a lot around here and not just diapers.

BABIES!  They cause a lot of things to change.  Amen?

When they grow, they like things.  Things take up room and space and make noise and are fantastic for individual play time, but in a designated area.  Up until now, that’s been a corner of the living room.

This really blurry cell phone picture of Kenton climbing the stairs with toys strewn about in the background is the only photo I have of that nonsense. Clearly, it wasn’t something I was proud of! Our front door is just off to the left – so that was the scene that greeted people as soon as they entered the Dream. Not exactly welcoming.

We have now completely overhauled that room and made it much less kid-friendly (Ha! Seriously… sharp corners, a bar, “expensive-if-we-would-have-paid-full-price” furniture… not for the kiddos!)… which means the toys are gone and now in the guest bedroom! It’s the best room in the Dream for a play space.

My view from the kitchen – before the transformation.

Our guest room (the empty one with the ugly standing lamp) is right off the family room and kitchen.  We do get a steady stream of visitors, but we don’t feel like a B&B. So, we thought we could sacrifice the queen guest bed for something smaller and use the space for our little man’s possessions.

Here is what it looked like before:

We sold the furniture and mattress on Craig’s List. I also feel compelled to tell you that the comforter seen above only lived with us for a short time. We replaced it with a super cute Angela Adams polka-dot duvet cover. (We’re a bit obsessed with polka-dots). Okay, I feel better now.

Now, the guest/playroom is filled up with a trundle bed for guests/doubles as a day bed for reading time (or mommy rest time while a cute baby boy plays, but screams in horror if I leave his presence), sweet original art, a new (to us) changing table, kid’s art table, toys (TONS of toys!), and one happy pre-toddler…

Well, mostly happy…

I’ll be back soon with updates on this room… including how I turned this menagerie of fabric into a real focal point…

So far, we’ve only invested about $70 in the room. Sweet! More on that soon. For now, I need to tend to a baby boy calling “mommommommommaaaaa” over the monitor.

Read Full Post »

Dream Rocker

“Dream Rocker” is actually the name of the nursery chair we ended up with.  Destiny?  Abso-freaking-lutely!  More on that in a bit… or right now, if you’re impatient and just scroll to the bottom of this post.  For the rest of us though… here’s the story of how we wound up with our Dream Rocker.

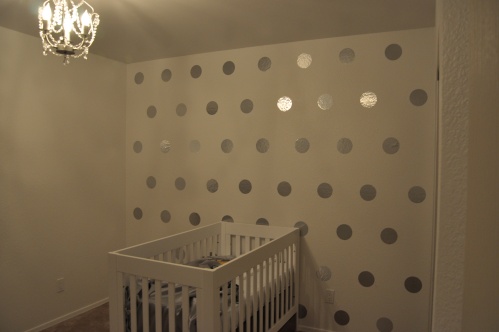
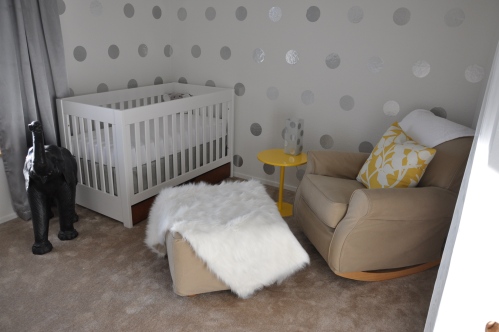
Those following our nursery progress know we’re stalkers.  We are not ashamed of that fact.  We are obsessed with stalking our local Craig’s List for the latest deals – especially when there is a specific item we’re hoping to bring home to The Dream.  At the top of that list lately?  A glider/rocker/some kind of comfy chair for the nursery – one that fit the small space and specific aesthetic style we have going on in there.  Here’s a shot from the polka-dot post

...the corner on the left side is where we envisioned our chair.

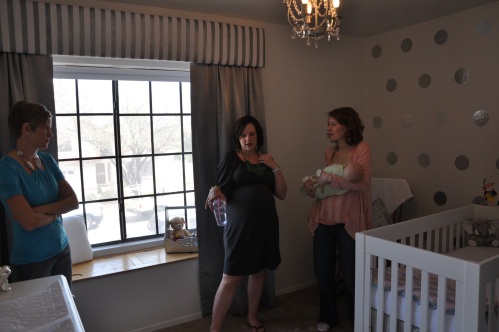
If you’ve been really observant… you may have noticed something filling that corner in a “sneak preview” photo we shared while recapping our Dream Shower.

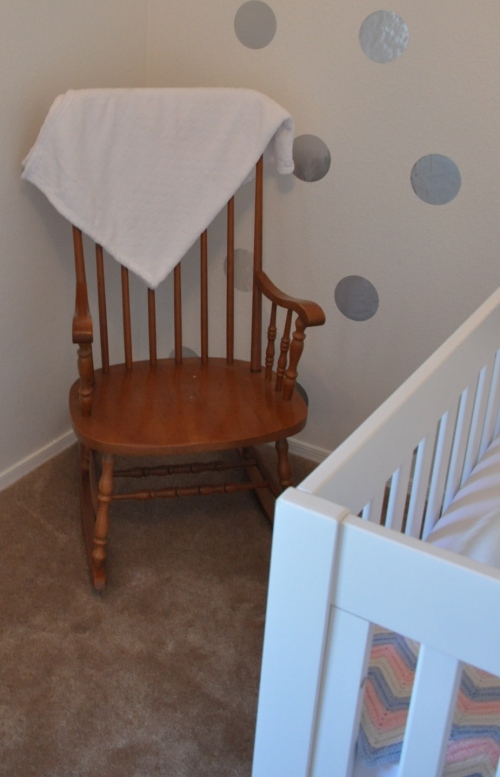
That’s nothing more than a placeholder.  A hand-me-down, terribly uncomfortable rocking chair.  Here she is:

the stand in

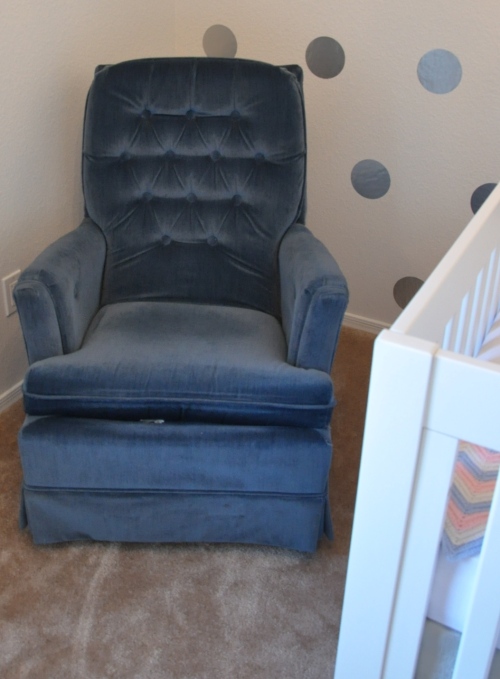
This old thing held the place for our future chair for a few weeks as we continued our obsessive stalking.  Daily, we observed gliders in every color, condition and at every price point come across our screen – but nothing was quite right.  Then, as if out of nowhere, we noticed a chair sitting in the corner of our master bedroom.  It was Mrs. Dreamer’s grandmother’s chair.  It’s comfy, it’s small, it rocks – perhaps it would work?!

a possibility

Clearly, the color is a problem.  It’s blue and we don’t know if the mini-Dreamer will be of the pink or blue variety yet.  Also, it simply doesn’t go with the colors in the room.  We thought it would be fun to change it to a bright, statement color – or make it gray so it flowed with the rest of the room.  So, we trekked over to Target to check out their selection of slipcovers.  We wound up with the only option they had that was close to the chair’s measurements…

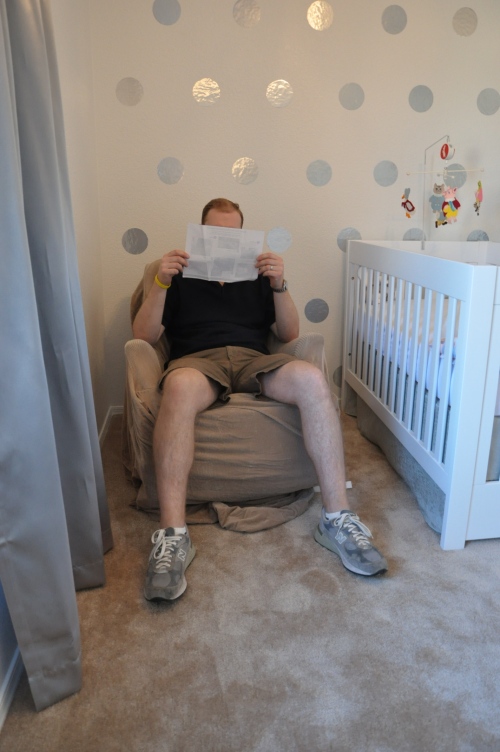
Mr. Dreamer is reading the instructions (yes, the cover is already on the chair – that’s how we roll – install first, read directions later).  Clearly this is not going to work.  First, the color is blah and second, it’s simply too big.

We joked that it looked like a Biggest Loser contestant towards the end of the show – with way too much skin for a smaller body.

Needless to say, we promptly returned the slip cover and contemplated our next move: reupholstering.

We love a good DIY project, but reupholstering grandma’s chair is simply not something we’re willing to attempt on our own.  This was definitely something to call in the professionals for.  Problem is, the professionals are darn expensive.  Having this piece reupholstered in a gray fabric would cost around $550.  Since we new we could get a new chair for that price, we promptly passed and went back to square one.  Literally.  Back the original object of our obsession: Craig’s List.

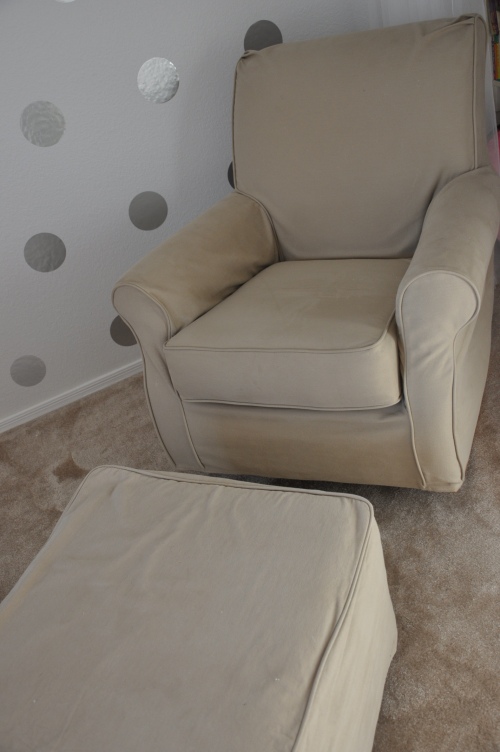
That’s where Mr. Dreamer spotted it.  A listing for a Pottery Barn “Dream Rocker.”  We’d already perused our local Pottery Barn Kid’s store – loved the pieces, hated the prices.  We knew that a new chair and ottoman from that store would set us back around $1,000. So, when we spotted a used one for $300, we knew we had a good deal on our hands. We promptly picked her up and brought her home.  (The model we wound up with is a few years old and no longer available. This Charleston rocker is the closest comparison.)

While we were thrilled with our “find” – she’s not perfect.

First, she’s still a blah color.  However, through this process, we quickly learned that gray chairs are not readily available – unless you want to pay top dollar.  Also, we were glad she’s a neutral and not pastel green or some other color we would have never put in our nursery. (And because Pottery Barn slipcovers for this chair/ottoman would cost us about $500 – the color stays.)

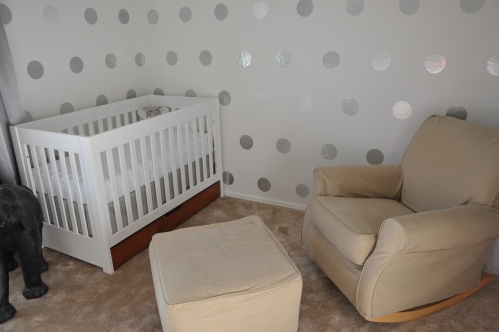
Second, she’s kind of a big girl – definitely bigger than we thought… especially with the ottoman.  So big, in fact, she wouldn’t fit in the corner where we planned to put her.  That meant – we had to rearrange the nursery.  We tried many, many different options – but wound up thinking this was the best setup:

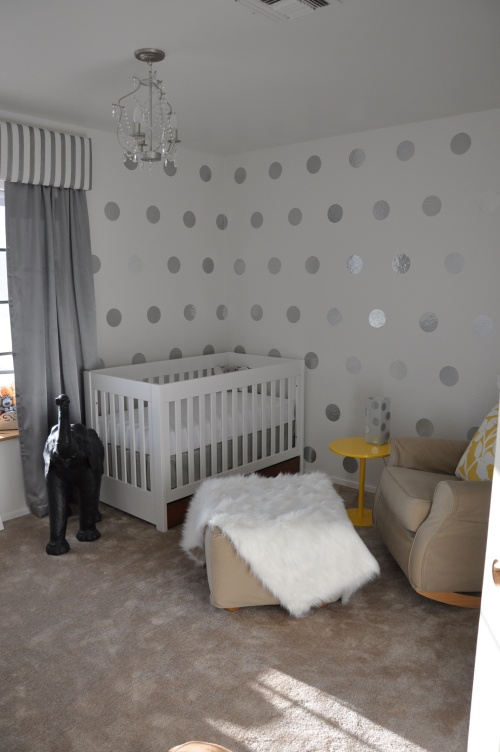
We snapped this photo after adding more polka-dots to the smaller wall next to the window.  We think that makes this part of the room flow better.  But that’s it.  No more polka-dots.  Much more would be overkill.

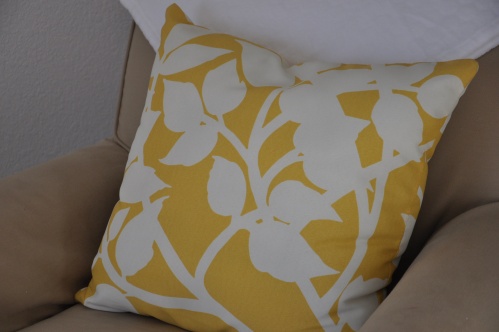
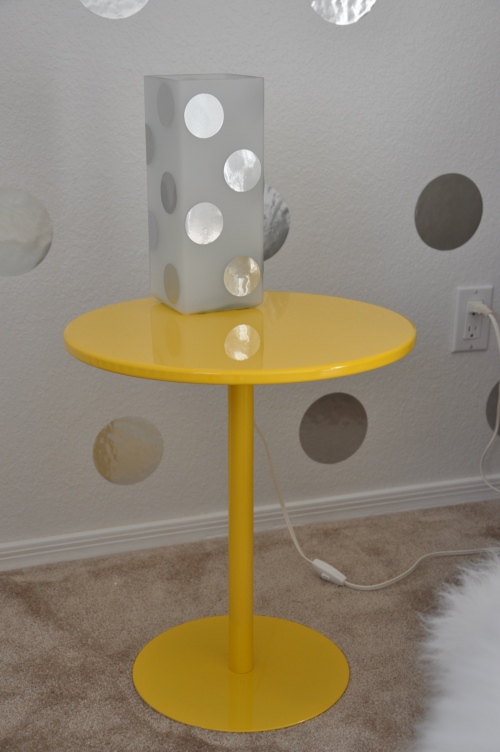
Okay, so the space problem is solved – but not the blah color.  All along, we’ve know that a “white and silver” nursery would eventually become too monotone.  We wanted to add a splash of color – but we weren’t sure what color or where to splash it.  After falling in love with our friend Carrie‘s creative genius behind the shower she threw for us – we were inspired.  She chose gray and yellow as the colors.  After the shower, Mrs. Dreamer couldn’t get that fun, bold yellow out of her head.  So – that’s what we chose as the accent color and here’s how we splashed it:

(Okay, so we lied about a few more polka-dots – more on that later.)

These two bold yellow pieces came from Crate & Barrel – and they’re actually part of their new outdoor furniture collection.  (Find the pillow here and the table here.)  However, we thought they were the perfect addition to splash inside our nursery.

We also draped a faux sheepskin rug over the ottoman…

…not only does it mask the blah color of the chair with one of our primary schemes, it adds a nice, rich texture (and feels really good to bare feet… just sayin’).  We’ve had the rug for a while and planned to put it on the floor in front of the crib – but think this is a better choice!

Budget for this project:

$300 for chair/ottoman

$35 for faux sheepskin rug from Tuesday Morning

$33 for the Crate and Barrel yellow accent pieces (they actually total $77, but we still had $44 credit leftover from our WEDDING registry – yep, that was over three years ago!)

Already had the lamp and extra polka-dots

TOTAL = $368

So, there you have it.  The story of how the Dream Rocker came to The Dream – and got splashed with a bit of yellow.  We have plans to splash a bit more yellow throughout the room, in subtle ways.  Here’s another look… please comment and let us know what you think!

Read Full Post »

I just sent Mr. Dreamer a list.  It’s a list of FUN things we get to do to prep the nursery for our beh-beh.  I also sent the following note at the top of the list:

Here’s the list…. Deep breath… stress is not allowed.  It’s just a list!

  • Ceiling
    • Remove fan
    • Fill holes
    • Sand
    • Paint
    • Hang chandelier
  • Paint
    • Baseboards
    • Back of door
    • Inside closet
    • Walls
  • Remove closet doors (negotiable) – if removed, decide on fabric/curtains
  • Dresser
    • Remove current hardware
    • Sand
    • Paint
    • Put on new knobs
    • Line drawers
    • Find organizer for top
  • Put crib together
  • Books
    • Shelf on wall?
    • Work into closet?
    • Need to decide
  • Window
    • Pick fabric
    • Make curtains
    • Make valance
    • Make pillows (for bay window seat)
    • Get black-out shade
  • Wall Décor
    • Pick Michelle/Jason baby photos for above crib – Ikea frames (craft? Decide)
    • Find silver polk-a-dot decals and order
    • Decide where Melsie farm paintings go
  • Continue to stalk Craig’s List for Glider/ottoman
  • Side table – paint? Buy new?

Whew!  Do we have our work cut out for us or what?  Baby isn’t coming until the end of May, but our goal to get (most of) this done is March 19th.  That’s the day my girl, Carrie is hosting a shower at the Dream and it’s a perfect opportunity to show off the “chambre de bebe.”  It’s also a deadline, and the Dreamers LOVE a deadline!

So, we’ll keep you update on how all that goes.  Meanwhile, we’ll soon be bringing you a post about a VERY EXCITING new addition to the Dream, which has a lot to do with the following object being dragged away with bulk trash this week:

buh-bye!

Happiness. Happiness. HAPPINESS!  SO excited to share… stay tuned…

Read Full Post »

It has begun!

“The Great Master Dream-room Makeover 2010”

before

The results of our poll were clear.  The first project you thought we should tackle during year two in the Dream was our bedroom.  So, that’s what we’re currently tackling.  We have the sore backs, tired eyes and paint in hair to prove it.

To be completely honest – the true after pic is going to take a while.  After all, we do have real jobs and other commitments that limit our makeover-ing to weekends.  For example, we’ll have to live with the popcorn ceiling and boring carpet for a bit.  However – do we have to live with boring white walls?  Oh, H-E-double-hockey-sticks, NO.

For the overall room color palette, we decided to go with a soothing blue-gray.  The primary color – that Mr. Dreamer is so skillfully applying in the photo above has a quite blog-appropriate name, “Online.”  We love it!  But… we faced a bit of a dilemma when it came to the accent color…

We’re a bit impulsive.  So, we bought our paint without first getting samples and testing it.  No biggie with the “Online” color – we love it!  However, we thought more gray would show through than blue.  Wrong!  Again, no biggie – except that we bought a blue paint for the accent walls (bottom color in above picture).  Helloooo, smurf room!  That would be way too much blue.  So, we stalled the whole project – to actually go and purchase samples (imagine that?!) – and wound up with a lovely charcoal gray (above color in pic above), called Software.  Ha!  Paint names are ridiculous.  (Our paint, as always, is from Sherwin Williams.)

You’ll have to wait to see “Software” in all it’s glory – a few more touches need to be made to the room before we can disclose those pics.

As you can see from the “before” pic, we are the king and queen of bedroom hodge-podge furniture.  Nothing matches.  Everything was brought into our marriage from our single lives – which was also hodge-podge.  Mrs. Dreamer, does not mind the mismatched look.  In fact, she wouldn’t mind having all sorts of mismatched – yet coordinated – pieces.  Mr. Dreamer, however, was passionately against that idea.  So – there were some “discussions” about that in the Dream.  As most happily-married couples. we have fine-tuned the concept of compromise – and that’s what we went with for the furniture.  More photos to come – but here’s a sampling of what we did on Saturday night:

Ah… yes… self-assemble furniture.  Not the fancy-shmancy furniture fare the hubs wanted and not the needs-to-be-refinished kind the wife wanted.  Compromise.  Over a bottle of wine and an all-nighter on a Saturday.  Good times.  The bullies would tell you all about it if they could talk…

They witnessed it all from the front row called the master bathroom.  (Check out that super-cool linoleum – just screaming for a makeover of it’s own!  Someday…)

More from “The Great Master Dream-room Makeover 2010” to come… until then, Sweet Dreams!

Read Full Post »

For our first official post of the summer, what better topic than the backyard grill/BBQ?

Who wouldn’t dream of having a custom-built BBQ on your patio?  Nice feature, huh?  Kinda pricey though.  Unless you “inherit” the sad shell of a former such luxury with your foreclosed home, which you bought with your super-handy hubs, whose ultra-super-handy-pops is always willing to lend a helping hand.

surveying the scene

So… here’s what we started with…

Ugly.  Sad. Pitiful.  EYESORE.

So bad, in fact, we put up plywood support and duct-taped plastic tablecloths over this thing in an attempt to sheild it from view during our Open Dream Party.  It was the perfect spot to serve drinks, including this YUMMY sangria, but we would never force our guests to see the extreme DIY home improvement project that awaited us underneath.

But once we did have the time/energy to tackle it – we think the results are quite impressive!

Here’s how the Dream boys got ‘er done:

filled a gaping hole in the back with recycled pavers we found in the backyard

the hole in front was measured, cut and filled so that our existing grill would be a perfect fit

after the el-crappo tile on top was removed.... the surface was re-enforced with plywood and Dura Rock

new tile went on that surface like a breeze


it took just a couple of hours to set and grout

after a little paint to cover the new stucco (DIY) job...

voila! the eyesore is now quite nice to gaze upon

The BEST part?  The entire project, which the pro’s would charge thousands to do, cost us less than $150.  Here’s how:

Mortar = $6

Bricks/Pavers to fill holes = Free!  Recycled from ones we dug up on the backyard

Plywood/wood = $19

Dura Rock = $16

Tile/grout = $90

Paint = already had

Grill = already had

Labor = FREE!

Total cost = $131

Yep, you can color us happy and know that we’ll be enjoying many a grilled meal in the future.

Happy Summer!

Read Full Post »

So, Mr. & Mrs. Dreamer – the two people who feed us SCRUMPTIOUS kibble twice a day – are outside working on something, so the Bulldogs are taking over this blog.

your guest bloggers for the day, Paris and Bowdoin

You can read more about how awesome we are here.

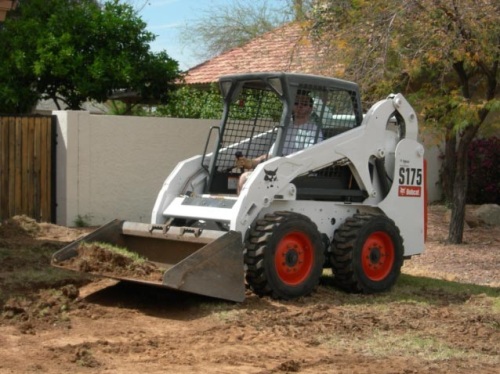
As you can imagine, this whole “Dreamscaping” nonsense totally rocked our world.  We had already spent several months peeing and pooping all over the backyard – making sure every inch was designated Bowdoin/Paris territory.  Then, this crazy “bobcat” invaded…

Dad calls it a "bobcat"...

…but there’s no way in the vet’s office that’s a cat.  I mean, we can totally take down a cat… but this sucker… (was a bit beyond our abilities.)

*sigh*

So, we just had to sit back and let it scoop up all of our favorite pee spots, then dump (rock) on them.

however...

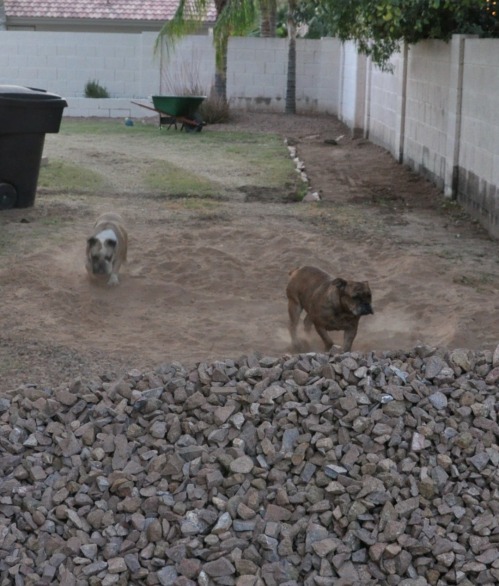
there was one incredible benefit to having this “cat” in the backyard.  It’s big paws churned up the BEST DIRT PIT EVER.  It provided endless good times…

for wrestling...

for playing "where's Paris?"...

what did you say?

I know, I know. I look like a beached whale. Shut UP!

we got our tongues...

and our noses caked in dirt.

In other words, it was AWESOME!

In fact, we’re kind of sad that it’s all cleaned up now – and so are we.  No more dirt pit meant the dreaded trip to the groomer for us.  BOO!  Stinky is so in right now, someone needs to explain that to our owners.  Anywho, we’ve about exhausted our word-base, so we’ll sign off for now, until some other crazy project rocks our world and we feel compelled to bully into the blog again.

'nite 'nite!


Read Full Post »

Any idea what weighs 45 tons?  Hmm… let’s ask Google that question…

this GE switcher/4-axle diesel locomotive...

this whale, who had an unfortunate run-in with a cargo ship...

the crane that took out this house (yikes!)...

and (of course) the world's largest time capsule...

So, perhaps that puts into perspective the “Dreamer Load” dumped on our yard…

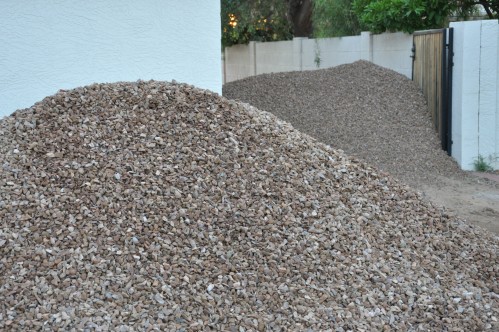
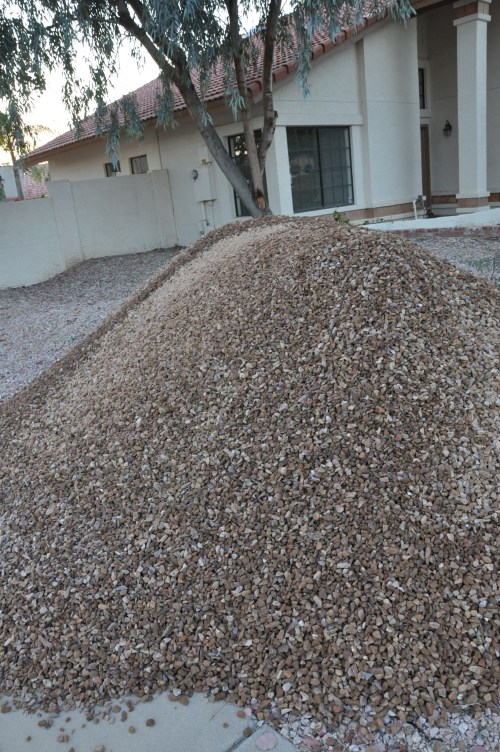
these two piles represent about half of our load

That, my friends, would be 45 tons of landscaping rocks.  So, why would we subject ourselves to this rock invasion?  Well, we have a few good reasons:

1) We live in the desert – so grass is not only difficult to keep alive, it requires a lot of water – which is a precious resource in these parts

2) The city we live in offers a rebate if we convert our grass into “desert-scape” that requires less water

3) Desert-scape landscaping is easier to maintain

4) We think the rocks – with some soon-to-be-added desert plants – add to the southwest charm of our Dream

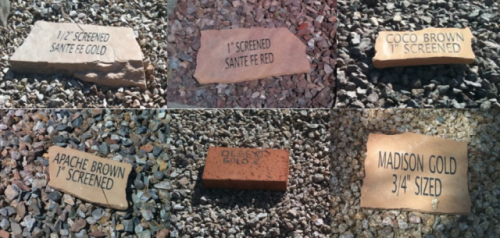
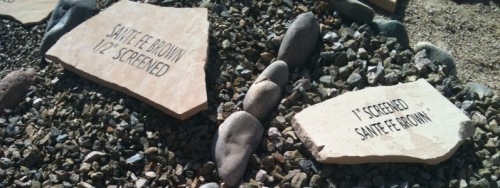
So, with that decision made, we headed out on a field trip – to rock quarries – to check out the rock options.  What we found was a dizzying array of choices.  First, we had to pick a color:

(work with us here... we have yet to invest in photo shop)

Then, we had to pick a size…

size matters

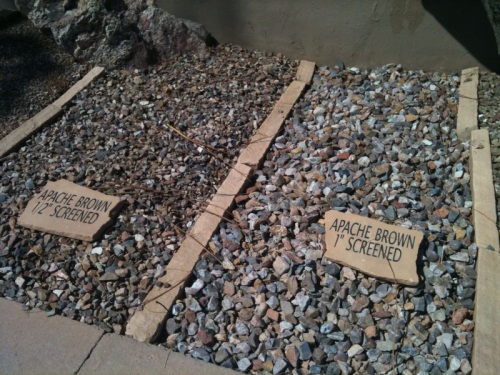
We both agreed on the size, 1/2 inch screened.  Too much bigger looks chunky.  Too much smaller looks dirty/sandy.  However, we did disagree on the color.  Mr. Dreamer preferred a red tone, while Mrs. Dreamer leaned towards brown.  In the end, Mrs. Dreamer proved most persuasive and we went with Apache Brown.  It’s not the cheapest rock available – but we decided that this was a job we only want to do once and we might as well spend a bit more cash on a color we really like – instead of the cheapest one.  It ended up looking very nice and we’re quite pleased with the choice.

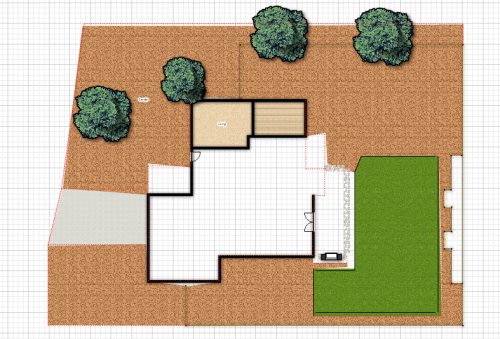
With that decision made, now we needed to know how much rock it would take to cover our yard.  From the professional estimates we got, we knew that 1 ton of 1/2″ rock covers 120 square feet with a two-inch depth.  But how much square footage are we working with???  To find out, we used a super-cool website, www.floorplanner.com, for free! (One “pro” offered to do the exact same thing for us for $250.)  We just walked around the perimeter with measuring tape, sketched out what we planned to do, plugged in those numbers and voila! Here’s what it looks like:

our lot is 1/5 of an acre

The brown areas are where we planned to put the rock.  This program allowed us to calculate the square footage of just that area.  Turned out to be 5,400 square feet – plug that into the earlier equation and it turned out we needed 45 tons!

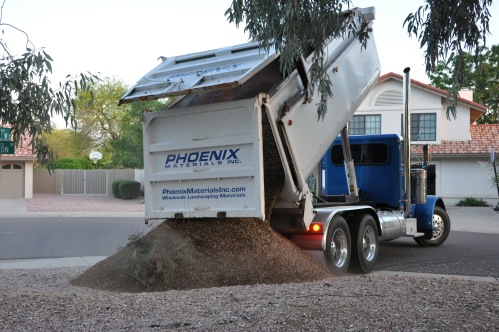
So, now we knew the color, size and amount of rock needed – we just needed to pull the trigger and make the purchase.  We thought that by skipping the fancy landscaping show rooms and heading straight to the quarries, we could cut down on the cost.  We were wrong!  The average cost for the Apache Brown rock we wanted at those places was $45/ton.  So, Mr. Dreamer took to one of our favorite websites, Craig’s List, to hunt down a better deal – and we got one!  For just $33/ton – we were able to buy the exact rock we needed through an independent trucker.

we highly recommend Justin at Phoenix Materials, Inc!

Our order took two double-dump truck trips… and the delivery drew our neighbors out into the street to check it out… who doesn’t love watching big machinery at work?
Check out video of the action here.

In his wake, Justin left behind four HUGE piles for us to work with…

the tough part is about to begin

The rocker-pro’s who so willingly offered us free estimates on our dreamscaping… were going to charge us $25/ton to spread the rock.  With 45 tons, that’s $1,125!  (Yes, that’s in addition to the cost of the rock itself.)  That was a bit steep for us…  So, we managed to convince some (totally awesome) friends and family to come over and help us.  With our eight-member crew, we were able to spread most of the rock in one Saturday – and all we had to pay for was breakfast and lunch… SCORE!

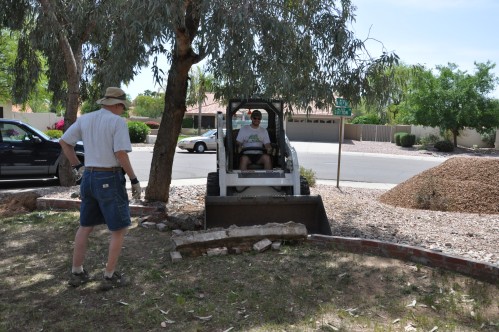
But before we could spread the rock… we had to demo the yard…

bobcat vs. random brick fence eyesore

clearly, the bobcat is the winner here

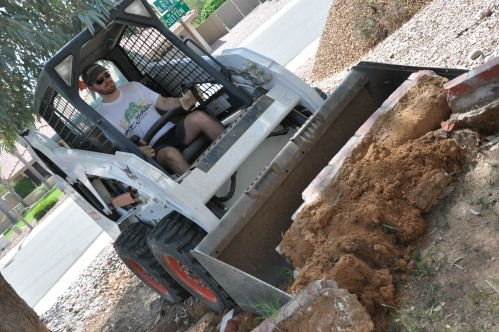
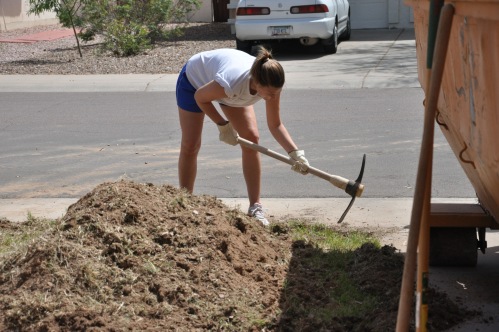
the bobcat also scraped away the struggling lawn

the sections the bobcat couldn't get to had to be hacked away by hand

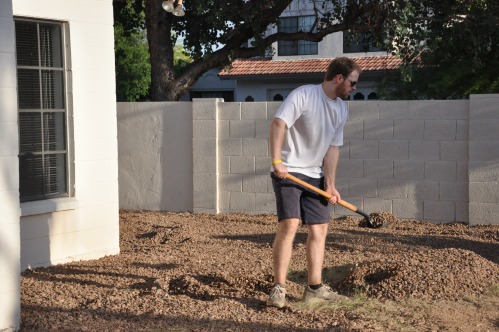
Once those areas were clear, the back-breaking job of shoveling and raking all 45 tons of rock into place began…

mr dreamer shows us how it's done

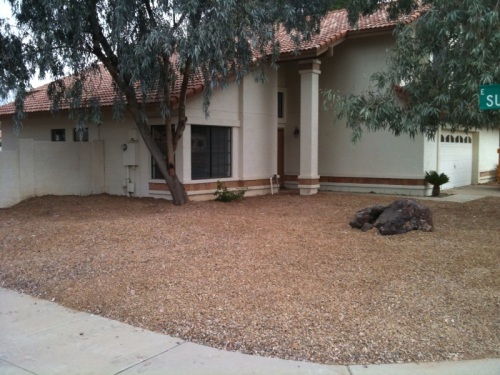
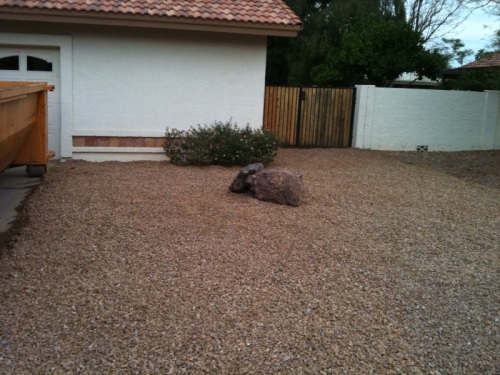
Not too many pictures of this phase, since all 8 sets of hands were working hard.  We were all quite impressed with what we were able to accomplish in one day!  Keep in mind that this is still in the “during” phase of our dreamscaping process… but here are some after shots of the great rock dump…

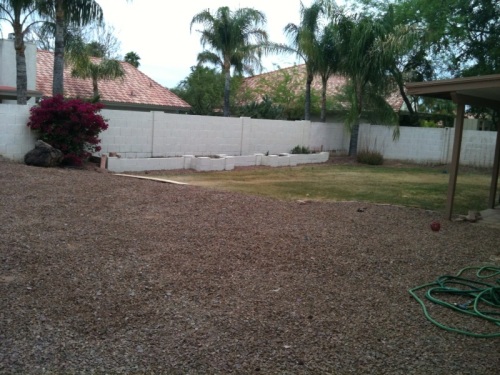
Look pretty blah?  Actually, that was our goal during this phase.  We needed to get our long-neglected foreclosed-upon yard back to a blank slate so we could start from scratch.  Next up:
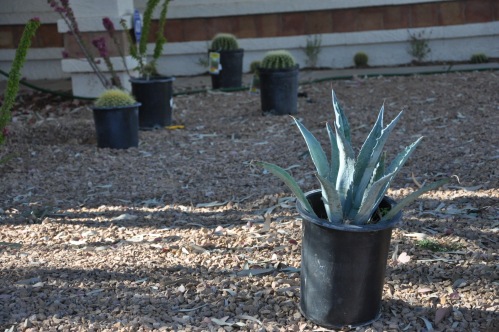
the plants we selected to dress up our rocks

But first, I fear some rambunctious bulldogs may take over the blog to tell their side of the story…

huh? did someone say bulldogs?

*Rail car photo found here, Whale photo found here, Crane vs. House photo found here, Time Capsule photo found here.

Read Full Post »

Older Posts »