Feeds:
Posts
Comments

Archive for April, 2011

Here’s a closer look at the silver touches in our white & silver with a splash of yellow nursery…

First up, diaper storage. We wanted a creative way to store this nursery necessity – without drawing a lot of attention to them. We found the perfect solution at Ikea:

The Allamalla (don’t you LOVE those names?!) wall basket was only $19.99. It’s three holders are the perfect size for diapers. Only problem – that black iron. We knew that would stick out like a sore thumb in our space. So… cue a little silver spray paint…

and VOILA! Here she is in all her silver, diaper-holding glory…

So, once the diapers were stored, we also wanted a place to keep all those cute little bebe toys. You know, up high and away from the infamous toy-hoarder in our house…

"what?"

We spotted a great basket at Joann’s – in the clearance section…

We scored this for $12. But, yet again, we have a color issue – and, yet again, we whip out the silver spray paint…

And here’s the shiny silver toy holder in all it’s keeping the toys out of the Bulldog’s reach glory…

this is the face of a bulldog not pleased...

...and this is the look of sheer annoyance after realizing some of those toys SQUEAK! (How dare we keep him from them?!)

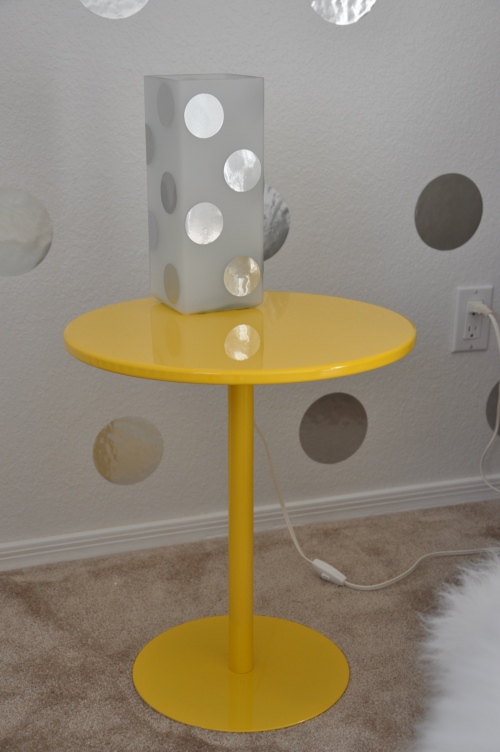
We also threw together this little DIY silver polka-dot lamp…

It started as a hand-me-down, simple frosted lamp – we think originally from Ikea. We simply used some of the leftover polka-dots from the wall project and cut smaller dots and stuck them on glass. Easy peasy.

Now, we need some help from YOU!

to paint or stain? that is the question....

Mr. Dreamer and the Original Dreamer handmade a FANTASTIC holder for our changing table pad. This will keep the bebe more secure – and helps our converted dresser actually look like what it will be used for – a changing table! Mrs. Dreamer thinks it should be painted white – to match the dresser, while Mr. Dreamer thinks the wood is too nice to cover in paint and it should be stained (likely to match the drawer on the crib). What say you? A couple more photos and a voting opportunity… can’t wait to see what the “masses” say!

Read Full Post »

A Dreamer Invasion

How ’bout a break from the nursery posts? All in favor? “Aye!” Okay, then keep reading…

We’ve discussed the Original Dreamers a few times here on the blog. We even took you on a tour of the “Original Dream” in Maine. Now, this fine, young couple – Mr. Dreamer’s parents – are what we call in Arizona, “snowbirds.” They are the lucky ones. They spend blizzardy Maine winters basking in the Arizona sunshine and hotter than heck Arizona summers enjoying “Vacationland” in Maine. Not fair, right? Yeah, we know.

Well, while in Arizona, these snowbirds roost in a cute little condo – just about three miles from the Dream. Of course, the DIY/home improvement bug is not one that has a cure and if you’ve caught it – it never EVER leaves your system. So, the condo (Dreamdo?) has also been a work in progress. Mr. & Mrs. Original Dreamer have redone the floors, painted the walls, installed ceiling fans – and, most recently, had the kitchen and bathrooms completely overhauled. It’s looking FANTASTIC.

We noticed something was missing though – and swooped in to help. The new kitchen looks great – but needed a splash of color. So, the two Mrs’s headed to Ikea in search of something fun to spunk up the space. We found the PERFECT fabric and created a valance (using our very own tutorial) for above the sink…

before

after

We snuck in while the Originals were out on an adventure with out of town guests and installed it for them. (Therefore, we don’t have many pictures. We snuck out just minutes before they came home. WHEW!)

They love it. We love it. All is well.

That is all.

Next time, more nursery. You’ve been warned.

Read Full Post »

To be completely honest, I was on the fence about having maternity photos taken.  (Weighing more than you ever have in your life doesn’t exactly cause one to rush in front of the camera.)  In fact, the only reason I did have some taken was because I was afraid I would regret not doing it.  And… I’m SO GLAD I decided to do this!

My friend, Hyun Lee, took the photos below.  She is ahhhh-mazing.  She and her assistant (her equally ahhhh-mazing husband, James) made us feel right at ease and we even had fun during the shoot.  In the end, we love how she captured this special moment in our lives – including creative angles and perspectives inside the Dream.

Here are just a few of the images.  Sorry, it took a lot to convince me to expose the belly – so most of those shots will stay private!

You like?  Let us know… leave a comment!  Meanwhile, check out this week’s bump pic (the above photos were taken during week 32).

Read Full Post »

Dream Boards

We’ve gulped the kool-aid.  Bowed to peer pressure.  Joined the crowd.  After incredibly convincing posts this week on Young House Love and Dream Book Design – we were SOLD!

We’re now pinning away on Pinterest… and CANNOT STOP OURSELVES.  It’s quite addictive and fun, fun, fun!!!

Here’s our page:  http://pinterest.com/mrsdreamer/ and a taste of what we’ve pinned so far…

Come and join the pinning-party.  Everybody’s doing it. 🙂

Read Full Post »

Dream Rocker

“Dream Rocker” is actually the name of the nursery chair we ended up with.  Destiny?  Abso-freaking-lutely!  More on that in a bit… or right now, if you’re impatient and just scroll to the bottom of this post.  For the rest of us though… here’s the story of how we wound up with our Dream Rocker.

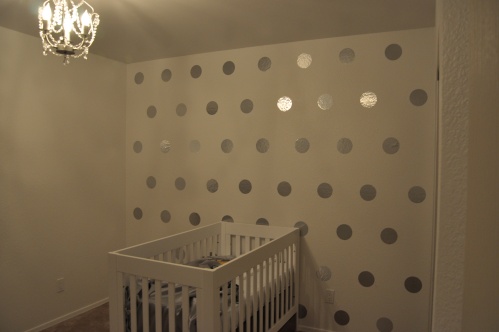
Those following our nursery progress know we’re stalkers.  We are not ashamed of that fact.  We are obsessed with stalking our local Craig’s List for the latest deals – especially when there is a specific item we’re hoping to bring home to The Dream.  At the top of that list lately?  A glider/rocker/some kind of comfy chair for the nursery – one that fit the small space and specific aesthetic style we have going on in there.  Here’s a shot from the polka-dot post

...the corner on the left side is where we envisioned our chair.

If you’ve been really observant… you may have noticed something filling that corner in a “sneak preview” photo we shared while recapping our Dream Shower.

That’s nothing more than a placeholder.  A hand-me-down, terribly uncomfortable rocking chair.  Here she is:
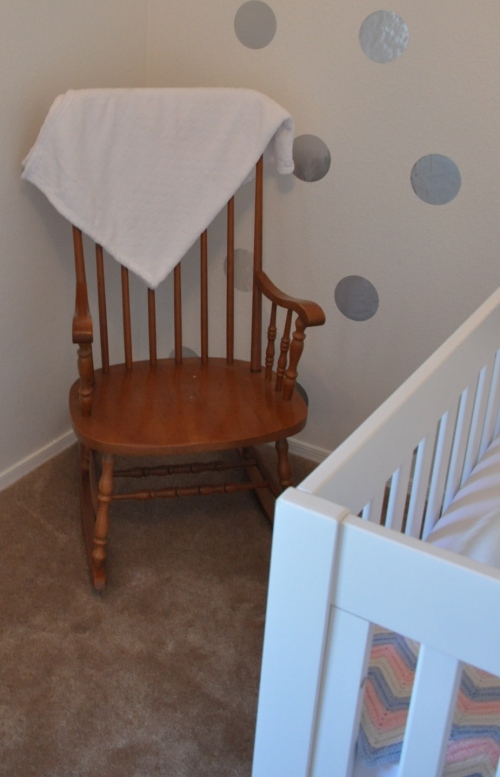
the stand in

This old thing held the place for our future chair for a few weeks as we continued our obsessive stalking.  Daily, we observed gliders in every color, condition and at every price point come across our screen – but nothing was quite right.  Then, as if out of nowhere, we noticed a chair sitting in the corner of our master bedroom.  It was Mrs. Dreamer’s grandmother’s chair.  It’s comfy, it’s small, it rocks – perhaps it would work?!
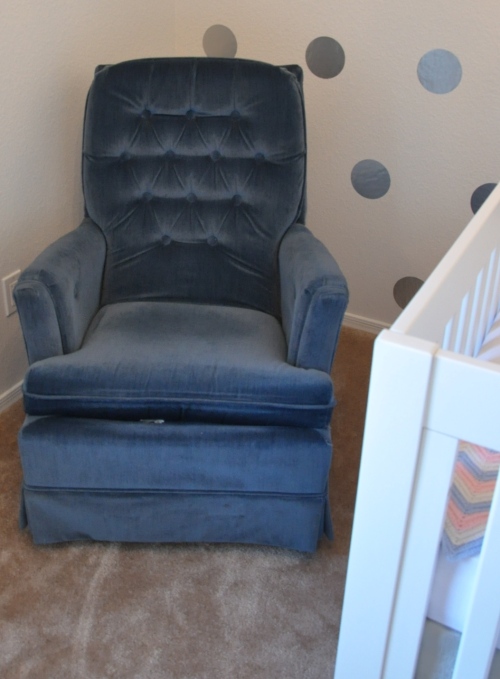
a possibility

Clearly, the color is a problem.  It’s blue and we don’t know if the mini-Dreamer will be of the pink or blue variety yet.  Also, it simply doesn’t go with the colors in the room.  We thought it would be fun to change it to a bright, statement color – or make it gray so it flowed with the rest of the room.  So, we trekked over to Target to check out their selection of slipcovers.  We wound up with the only option they had that was close to the chair’s measurements…
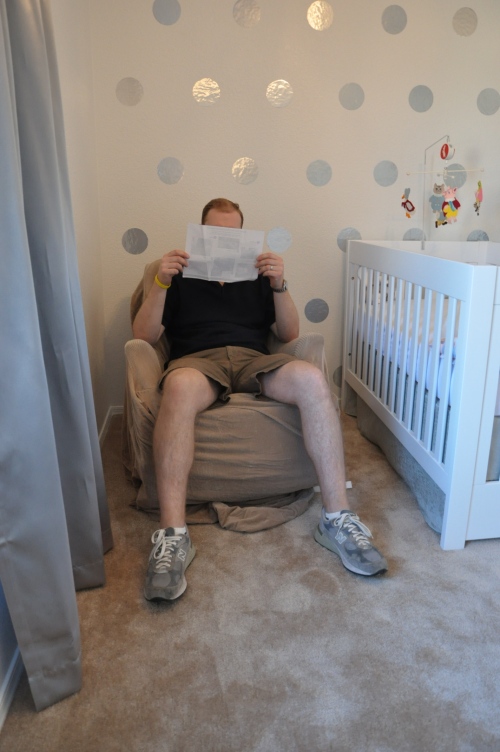
Mr. Dreamer is reading the instructions (yes, the cover is already on the chair – that’s how we roll – install first, read directions later).  Clearly this is not going to work.  First, the color is blah and second, it’s simply too big.
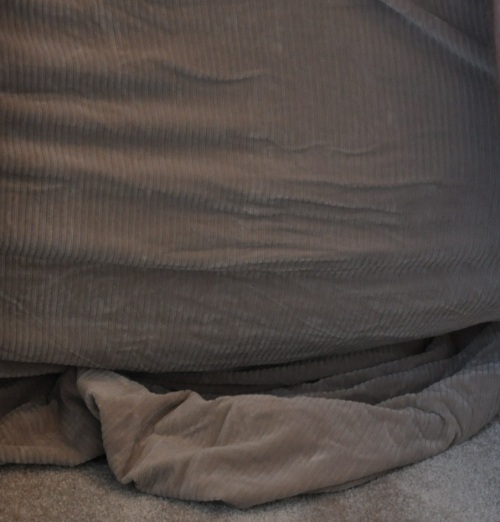
We joked that it looked like a Biggest Loser contestant towards the end of the show – with way too much skin for a smaller body.

Needless to say, we promptly returned the slip cover and contemplated our next move: reupholstering.

We love a good DIY project, but reupholstering grandma’s chair is simply not something we’re willing to attempt on our own.  This was definitely something to call in the professionals for.  Problem is, the professionals are darn expensive.  Having this piece reupholstered in a gray fabric would cost around $550.  Since we new we could get a new chair for that price, we promptly passed and went back to square one.  Literally.  Back the original object of our obsession: Craig’s List.

That’s where Mr. Dreamer spotted it.  A listing for a Pottery Barn “Dream Rocker.”  We’d already perused our local Pottery Barn Kid’s store – loved the pieces, hated the prices.  We knew that a new chair and ottoman from that store would set us back around $1,000. So, when we spotted a used one for $300, we knew we had a good deal on our hands. We promptly picked her up and brought her home.  (The model we wound up with is a few years old and no longer available. This Charleston rocker is the closest comparison.)
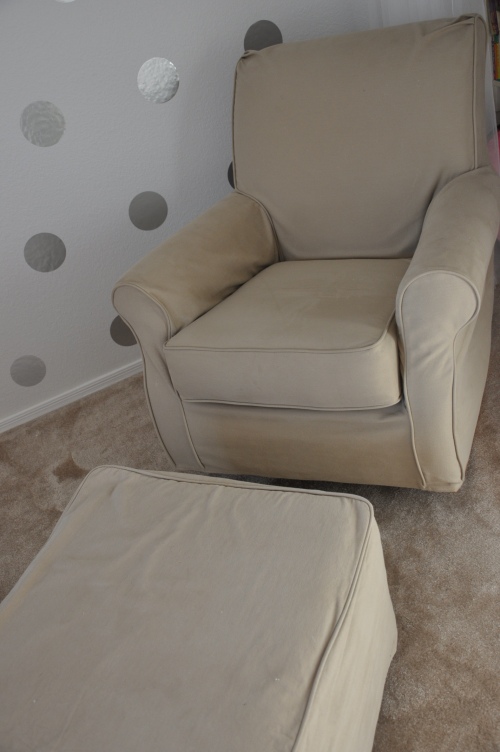
While we were thrilled with our “find” – she’s not perfect.

First, she’s still a blah color.  However, through this process, we quickly learned that gray chairs are not readily available – unless you want to pay top dollar.  Also, we were glad she’s a neutral and not pastel green or some other color we would have never put in our nursery. (And because Pottery Barn slipcovers for this chair/ottoman would cost us about $500 – the color stays.)

Second, she’s kind of a big girl – definitely bigger than we thought… especially with the ottoman.  So big, in fact, she wouldn’t fit in the corner where we planned to put her.  That meant – we had to rearrange the nursery.  We tried many, many different options – but wound up thinking this was the best setup:
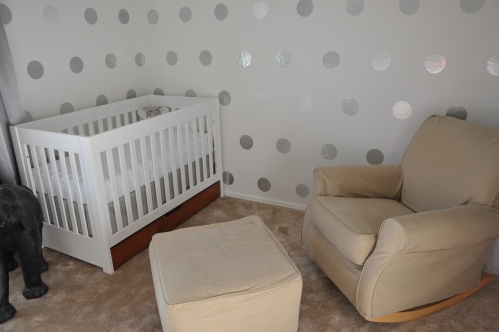
We snapped this photo after adding more polka-dots to the smaller wall next to the window.  We think that makes this part of the room flow better.  But that’s it.  No more polka-dots.  Much more would be overkill.

Okay, so the space problem is solved – but not the blah color.  All along, we’ve know that a “white and silver” nursery would eventually become too monotone.  We wanted to add a splash of color – but we weren’t sure what color or where to splash it.  After falling in love with our friend Carrie‘s creative genius behind the shower she threw for us – we were inspired.  She chose gray and yellow as the colors.  After the shower, Mrs. Dreamer couldn’t get that fun, bold yellow out of her head.  So – that’s what we chose as the accent color and here’s how we splashed it:
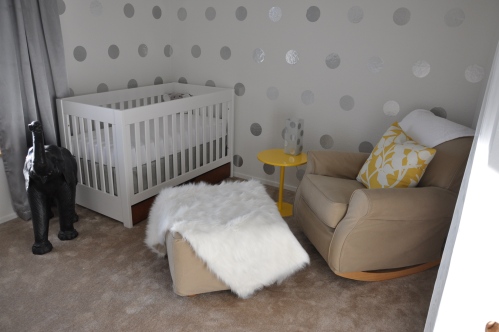
(Okay, so we lied about a few more polka-dots – more on that later.)

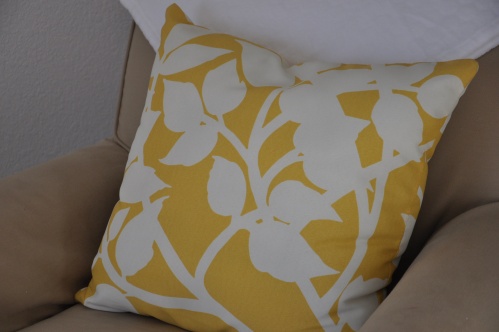
These two bold yellow pieces came from Crate & Barrel – and they’re actually part of their new outdoor furniture collection.  (Find the pillow here and the table here.)  However, we thought they were the perfect addition to splash inside our nursery.

We also draped a faux sheepskin rug over the ottoman…

…not only does it mask the blah color of the chair with one of our primary schemes, it adds a nice, rich texture (and feels really good to bare feet… just sayin’).  We’ve had the rug for a while and planned to put it on the floor in front of the crib – but think this is a better choice!

Budget for this project:

$300 for chair/ottoman

$35 for faux sheepskin rug from Tuesday Morning

$33 for the Crate and Barrel yellow accent pieces (they actually total $77, but we still had $44 credit leftover from our WEDDING registry – yep, that was over three years ago!)

Already had the lamp and extra polka-dots

TOTAL = $368

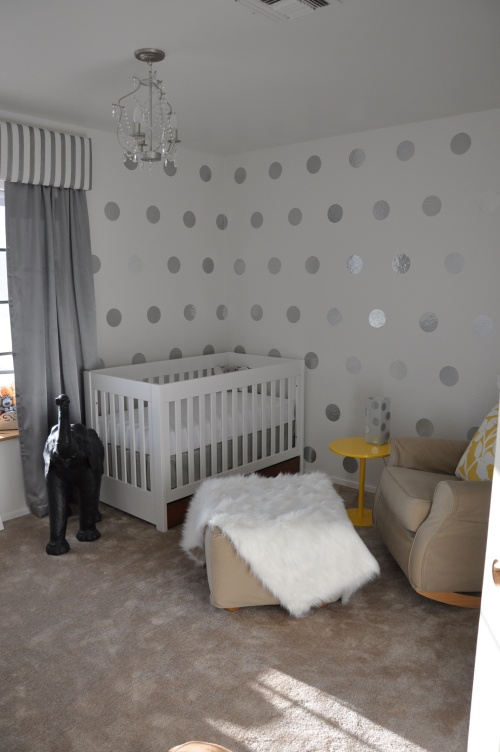
So, there you have it.  The story of how the Dream Rocker came to The Dream – and got splashed with a bit of yellow.  We have plans to splash a bit more yellow throughout the room, in subtle ways.  Here’s another look… please comment and let us know what you think!
Read Full Post »

The quest for striped window treatments in the nursery is well-documented.  For a refresher, check out this post.  The dream eluded us for quite some time, but now the Dreamers are very happy to report that with a bit of creativity and team-work, this is one more item we can finally check off the nursery to-do list:

nursery window treatment = done!

When the striped curtains we originally wanted proved impossible to come by, we compromised on a pair of silver panels.  However, the stripe dream didn’t die – it just moved north – to the valance.  Since you already know the gray striped fabric you see above doesn’t exist in real life (otherwise it would be the curtains themselves) – you are correct to assume the valance is a Dream-it-Yourself original.

Mrs. Dreamer created the striped look using leftover scraps from the many failed attempts at DIY striped curtains.  Turns out, there was just enough of the Ikea Lenda curtains remaining for this project.  The fabric on those curtains has a raised ridge every six inches – making it super easy to get straight stripes.  We just used painter’s tape to block of the future white stripes…

Then, using silver fabric paint (also leftover from the previous curtain attempts)… just filled in the stripes…

However, when you’re preggers, this project requires a certain “look”…

note a curious "miss paris" in the backgound...

Mask to protect the wee one from the paint fumes and an apron to protect the bump from an unwanted swipe of silver paint.  Love that thing, but it does get in the way sometimes!

After letting the stripes dry for a couple of days and the ironing the fabric (upside down!)… Mrs. Dreamer sewed three sections of stripes into the long, eight foot piece needed for the nursery valance…

We’ll save you the step-by-step process of how the valance itself was created – since we just followed our own tutorial, which you can find here.  Even though this valance has different measurements than the ones we have downstairs – we did the exact same steps and are just as happy with the results!

Once the valance was ready, we hung the silver curtains.

We had to measure several times to make sure the valance would cover just the right portion of the top of the curtains to hide the brackets and rod.  Then… it was time to get the valance up there.

With much finagling – requiring two people, so no photos – we finally got the valance secured at just the right height.  And voila!  Here is the final result…

We couldn’t be happier.  We got to incorporate the stripes – even if not as originally planned!

Here’s the budget breakdown for this project:

Silver panel curtains (already mentioned in a previous rant post) = $59.98

White fabric for valance = Already had (leftover Ikea curtains from previous projects)

Silver fabric paint = Already had

Sponge brush for painting stripes = Already had

Painter’s tape = Already had (we always have several rolls lying around – never know when the painting bug will strike!)

Wood for valance = $15

Batting for valance = Already had

Spray glue and fabric glue for valance = Already had

Curtain rod = $7

Middle support for curtain rod = came with rod – fine-tuned for our window by Mr. Dreamer

L-brackets for valance = $4

TOTAL = $85.98

Not bad for under $100, right?!

Here’s our progress on the overall nursery to-do list:

  • Ceiling
    • Remove fan
    • Fill holes
    • Sand
    • Paint
    • Hang chandelier


  • Paint
    • Baseboards
    • Back of door
    • Walls


  • Remove closet doors, hang curtains
  • Dresser
    • Remove current hardware
    • Sand
    • Paint
    • Put on new knobs
    • Line drawers
    • Find organizer for top
  • Put crib together
  • NEW: Build bookshelf for wall
  • Window
    • Pick fabric
    • Curtains
    • Make valance
    • Make pillows (for bay window seat) 3 down, a few more to go!
    • Get black-out shade
    • Hang black-out shade
  • Wall Décor
    • Pick Michelle/Jason baby photos for above crib – Ikea frames (craft? Decide)
    • Find silver polk-a-dot decals and order (actually, we did them ourselves!  More on that here.)
    • Decide where Melsie farm paintings go
  • Continue to stalk Craig’s List for Glider/ottoman – OR NEW: possibly reupholster a chair we already have… more on this soon!
  • Side table – paint? Buy new?

Read Full Post »