Feeds:
Posts
Comments

Archive for the ‘Family Room’ Category

If you live in the greater Phoenix-area, hopefully you’ve heard about the Junk in the Trunk Vintage Market. If not, well, now you know.

There is one tomorrow (Saturday, September 15th) at WestWorld in Scottsdale and I am SO EXCITED. I’ll be there with a group of girlfriends, Starbucks in hand, ready to find some great decor items for the Dream. Here’s what I’ve found in the past:
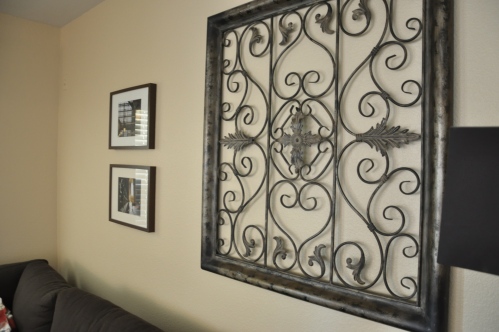
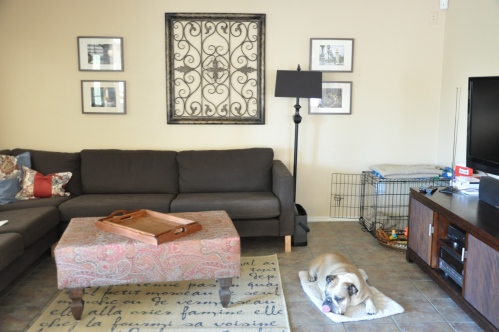
The iron wall hanging that is in our family room was the one and only item I purchased at my first Junk in the Trunk sale more than a year ago. It was about $40, which I thought was a great deal. Initially, I bought it to hang on our entry wall…

You can see the bottom of it in this shot of Kenton when he was four months old. MY BABY! Where has the time gone?! Seriously, they are only babies for approximately one nanosecond. WAH!!!!

Anyway, it’s now in the family room and I like it there for now.

Eventually, I’d like to get the four photos around it printed on 16×20 canvases. Currently, they are 8×10 photos in 16×20 frames. I think that size adjustment will look better on that wall.

Bowdoin the Bulldog, however, is not impressed. Shocker. Oh, and ignore the hot mess over there on the right – more on that in a minute.

So, at the last Junk in the Trunk Vintage Market a few months ago, I scored a few more sweet things for the Dream. I blogged about that here.

Fun. Fun.

Tomorrow, I’m on the hunt for at least three things. (The at least is a disclaimer for Mr. Dreamer – just so he knows if I find more than three things, I’m not breaking any promises. It’s only at least three… I’m actually hoping to find more.)

Back to the hot mess…
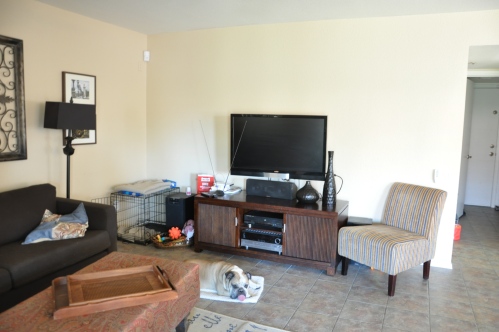
The wall where our TV is mounted is arguably the most boring wall in the entire house. Again, Bowdoin is not impressed – and no one can blame him. At the JITVM, I’ll be searching for some kind of shelf/mantle to mount over the TV – and possibly some fun things to display on it. Ideally, I want something nearly as long as that wall, kinda chunky, and the same stain as the TV stand – I know, it’s a very specific list.
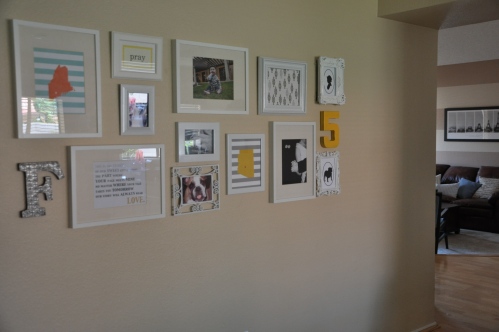
I’m also looking for a table to go under my gallery wall. A few weeks ago, the gals behind JITVM posted THE PERFECT table on Instagram and I commented that I had to have it! Well, I was just a couple of hours too late. Someone beat me to it. Boo Hoo! So, I’m hoping there’s something at tomorrow’s sale that’s even better.
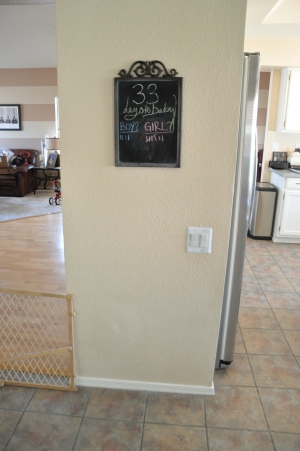
Finally (but not literally finally – see disclaimer above), I’d like to get a chalkboard to put on the bottom half of this wall – so Kenton can color on it. He’s a tad obsessed with his sidewalk chalk for the back patio, that he’s not allowed to bring inside. So, I thought that might be a practical and fun thing to add here. The chalkboard at the adult level we purchased in France right after we bought the Dream. Yes, that number is correct – 33 days to baby. I KNOW. Too fast, too fast.

See the Boy vs. Girl poll? Don’t worry, you’ll have a chance to cast your vote next week during PREGNANCY WEEK here on Our Dream Foreclosure.

So, anyone else heading to the Junk in the Trunk Vintage Market tomorrow? If so, comment and let me know! If you see me, say hi! I’ll be the one with the permagrin and beach ball tucked under my shirt. 🙂
Read Full Post »

Our gallery wall is growing…

I just love being able to add to this wall – and when baby #2 arrives, we’ll swap out some of the photos. But this one will stay…

The Kenton silhouette was a souvenir from the San Diego County Fair this summer.

There are approximately 400 million DIY tutorials out there for silhouettes. Or, you can pay the gal at the fair $15 to cut one for you – which is what I opted for. My Grandpa helped keep Kenton looking in one direction by playing his first birthday video, which he’ll watch over and over and over and over. Something about seeing himself on screen – he loves it.

She was also selling pre-done silhouettes of dog breeds. Of course, I couldn’t resist taking a Bulldog off her hands.

I found the white frames at TJ Maxx for $7 each.

The “5” was $2.50 at Hobby Lobby and I did a quick coat of spray paint we already had on hand. In case you’re wondering…

Jason + Michelle + Kenton + Baby + Bowdoin the Bulldog = 5.

The yellow is the same shade that accents Kenton’s nursery. I’ve decided to bring that pop of yellow throughout the house occasionally… in an attempt to tie things together a bit better.

I just love this wall. I don’t know why it took me so long to put it together in the first place!

However… Bowdoin is not impressed…

Hmph. I’m thinking about starting a “Bowdoin is not impressed” blog, like McKayla is Not Impressed. (Love that site!)

Bowdoin, by the way, is hanging out on the new rug in our family room (!)… more on that later.

Read Full Post »

Well, helloooo there.  Long time, no chat.  It’s been so long, in fact, my Aunt Holly emailed to ask if the blog moved because she hadn’t seen an update in a while.  Nope, we’re still here!  (Hi, Holly!) 🙂  I’ll explain the prolonged absence, I promise… but first… we need say goodbye.

Goodbye to the old, ugly, white, leather couches that occupied our living room:

Goodbye to the guest bedroom furniture… since baby’s need for a space to play now trumps a queen bed for guests:

Ignore the ugly bedspread! We did have a really nice Angela Adams duvet cover on there, but never bothered taking a pic. Oh well!

Goodbye to the brown leather couch in the family room:

Ahh... yes... in with the new already.

(well, not a real goodbye for the brown couch… just a move for that old girl)

Finally, the saddest of all… Goodbye Nikon 18-105 lens:

Sweet girl took an unfortunate plunge onto the tile floor and is getting a trip to Nikon Hospital.  We don’t know how long she’ll be in inpatient therapy.  For now, her cousin, our 50mm fixed lens is the only one we’ve got to snap shots around the Dream and of the wee one.

For those who speak “photog” – you know that’s a challenge to only shoot with a 50mm lens.  However, it will also be excellent practice and will hopefully make me a better photographer (silver lining!).

So… as you can see… we’ve had some MAJOR changes in the Dream lately.  I can’t wait to update you on what we’ve done/are doing with all of those newly empty spaces… good things, my friends, exciting things.

However, it’s not all goodbye.  We’ll also say, “Hello!” to the newest Dream dweller:

Yep!  Baby #2 is on the way!  I am due in mid-October and we are THRILLED.

So is Kenton, he just doesn’t know it yet.

Just like last time, the first trimester of pregnancy was easy-peasy, but left me with little-to-no energy.  Hopefully, that explains my absence as of late.  If my options were sleep or blog – sleep won EVERY. TIME.  As of this week, though, I’m officially entering trimester #2, which is good because I clearly have a lot of work to do!

PS: I’ve finally updated Kenton’s monthly pics.  Check them out here.

PPS: Follow me on Twitter or Instagram (mrsdreamer), where I definitely update more than once every three weeks!

Read Full Post »

It’s party time, people.  Pinterest partayy time!

So, a bunch of cool blogs that I follow — What the Graham, Mrs. Priss, Stucco Bungalow (among others) — are hosting a Pinterest Partayy today and I thought I’d join in the fun.

Basically, we’re all taking something we’ve “pinned” on Pinterest and instead of just leaving it there on our virtual board of DIY dreams… we’re making these projects reality.

Here’s my Pinspiration:

ORIGINAL SOURCES

1 – West Elm

2 – Tulip and Turnip

3 – Kara Paslay Designs

4 – Pepper Design Blog

And here is our finished product:

Disclaimer: For some reason, the photos do the fabric no justice.  It’s not as gold/red as it appears.  It actually has some silver and gray tones to it and blends really well with the color palette in this room.  I tried tweaking the colors in PhotoShop, but it still didn’t come out just right.  

We’ve been discussing making our own coffee table/ottoman for over a year.  Sad, but true.  I looked high and low for a used coffee table we could upholster, but never found one.  So, this entire piece is DIY by the Dreamers – the Mr did the construction and I did the upholstery – we tufted together.  (Sounds sexy, right?  Not really.)

I plan to do a more detailed Dream It Yourself (DIY) tutorial, but for the sake of getting this post up in time for the PARTAYY – here’s the shortened how-to version.

You start by enlisting your husband to build the frame:

We actually used fence post caps for the feet and they turned out perfect – and cheap!

Then, comes the upholstering…

Prequel… I didn’t get a photo, sorry!  We put furniture cushion foam (you know, the green kind) cut to measure – atop the wood frame.

1. Cover everything with batting.  I did two layers on the sides and one on top.  I secured it all with liquid spray adhesive.

2. Sew corners. (Sewing assistant in background is optional.) Sorry, no detail pics of this either.  It was a little frustrating.  In the end, I turned the fabric right-side down on top of the ottoman and pinned the corners.  I wanted it really taught, so I made sure I pinned it very snug.  Then, I sewed one line, about an inch below the corner of the foam down to the corner of the wood.  I cut out the access fabric, angling my cut to leave room for the corner to be covered.  They turned out really nice!  One corner was a little too snug, and I just sewed a new hem about a quarter-inch outside the original one, then ripped out the first one.  It fits perfectly!

3. Cut the bottom of the fabric, leaving enough extra to pull under the wood frame far enough that you won’t see the staples.

4. Staple away!

5. Be careful on the corners.

Here’s what it looked like when we were done with these steps…

(Again, it looks really red-orange here… not true to life, promise!)

So… now it’s time to TUFT.  That’s a term I, admittedly, had never heard of before starting this project.  I knew that tufting – or, adding buttons – would really take this piece up a notch… so… here we go…

Yes, we’re going a bit out of order here.  The tufting process actually begins before the fabric is upholstered.

1. We marked out the frame – penciling in where we knew the buttons would go.

2. Drill holes for the button threads.

3. Make buttons out of extra fabric using a kit sold at most craft stores.

3.5 (not pictured) – using upholstery needles, pull wax thread through the holes underneath, through the foam, batting and fabric.  It seems like it would be easy to loop the button and then draw the needle back through – but, for us, it was IMPOSSIBLE.  We drilled the holes bigger, tried every thing we could think of – but we could not get the needle back down through the hole.  So, unfortunately, we only had one piece of thread to work with. We tied it to the back of the button – then tied the two back-end threads next to each other together.  This is definitely a two person job – so you get the buttons really snug and TUFTED.  The word is making more sense now, isn’t it?  (Still not sexy though!)

4. It may be hard to tell what this is – but it is the underside of the buttons… the threads tied together.

And here, once again, is the finished project:

And some more looks… I am pretty damn proud of myself about those corners!  That’s the part I was most worried about…

So, what do you think?  Give me a comment below and let me know.  Meanwhile, check out the other Pinterest Partayy participants and their projects:

This is my kind of party!

If you did a Pinterest Partayy project, please link to it in your comment.   I can’t wait to see what everyone did.

Psst…. This ain’t my first rodeo.  A while back, I did another Pinterest-inspired project for the nursery – a “You are my Sunshine” wood canvas quote.  You can see that project here.  

Read Full Post »

We can hardly believe our Dream is a year old!

Okay, that’s a lie.  She’s actually 23 years old.

But, she’s a year old to us.

Today, we celebrate ONE YEAR since we signed our lives away and got the keys to our Dream.  In honor of this special day, let’s look back on what we’ve accomplished in our first year:


Whew!  Now, we’re tired.  But, no rest for the weary!  We still have A LOT to do to make the Dream truly dreamy (including a tad more work on the landscaping, eh?  Hey, give us a break, the average temperature here right now is 104!).  Here are some of our future projects… which one do you think we should tackle first?:

We definitely have our work cut out for us.  Help us decide what to do next!

Thanks, hopefully we’ll get to all of these projects in year 2 of livin’ in the Dream.   But now, we’re off to eat cake and toast year #1!

Read Full Post »

Nope.  No exciting announcements.  (As if the blog is the place we’d first announce a dream in the oven?!)

Just another little Then & Now action for you… the Dream Family room.  As we’ve mentioned before, the family room is an extension of our kitchen – a lovely feature that was on our “must” list while Dream shopping.  We’ve already told you how we had a design challenge on our hands with our color schemes and how we’ve tied the rooms together with some A-list-Pottery-Barn-esque fabric.  So, here is what we were working with…

then

then

now

Everything is different, except for the flooring.  Which wasn’t hard because the house was empty and the walls were white!  The hubs did a great job installing a new ceiling fan that actually matches our decor…

you can see the box valances found their way into this room as well...

ah, yes, the cork collection grows. but do you notice anything different?

We opted to switch out the white frames you previously saw for brown so these photos tie in better with…

this collection of photos from our France trip that flank our tv

All of these frames are from Ikea — steals for $5 (5×7) and $10 (8×10).  We’re sticklers for cohesiveness and flow… while these may not be the best quality, nobody’s going to get too close… they perfectly serve their purpose for now.

And now for the rest of the highlights:

cozy chair in the corner with a "Mrs. Dreamer" original pillow - same fabric as the valances

There’s still a lot to do…

  • Clearly, we’re in need of a “real” coffee table!
  • We’d love to put an area rug under said coffee table – but two smelly, drooly Bulldogs make that seem unlikely
  • Eventually, we’ll replace the off-white leather (hand-me-downs-of-which-we-are-so-grateful) furniture with brown leather — easier to keep clean and will better match our aesthetic tastes
  • Next up: painting the ceilings the same color as the walls (Colonial Buff by Sherwin Williams) and adding CROWN MOLDING!  Can’t wait!  We think that’s going to take the room to a whole new level.

We did not pay full price for ONE thing in this room (YAY!). Most of it we had before and moved with us into the Dream, but here’s a rundown so you can see where we spend our time NOT paying full price:

  • Couch, love seat, chair, ottoman – hand-me-downs from the parents
  • Media cabinet – consignment store (My Sister’s Attic)
  • TV – gift
  • Bar – Craig’s List
  • Lamps by couch – from a woman who is dealer for a big-furniture-chain – she advertised on Craig’s List and now we’re on her “list” (!)  More exciting finds to come from that… 🙂
  • Lamp behind chair – we’ve had the stand forever, but scored a new shade at a charity auction for $5
  • C&B Wicker side table – charity auction (retails for $90, we got it for $12)
  • Tile side table – My Sister’s Attic
  • Frames – Ikea
  • Photos in frames – taken ourselves on our trip to France
  • Clock – Holland Boone, using a gift certificate from our wedding
  • Globe – Marshall’s/Home Goods
  • Black vases – Costco (with a coupon)
  • Throw – TJ Maxx
  • Pillow – self-made
  • Valance – self-made
  • Blinds – Home Depot (with coupon)
  • Curtains and rod – Ikea

Oh yeah, we feel g-o-o-d about that!

Read Full Post »

Living in the desert, the chance of a white Christmas is slim to none.  However, this year, we will have a white anniversary.

skiing in dream conditions

We are celebrating wedding anniversary #2 on the slopes in Whistler, B.C.  (Making sure they’re all set for the Olympics in a few, short weeks!)

Meanwhile, back at the Dream, the pups are getting the star treatment from one set of “grandparents” and our Family Dream Room is enjoying a few more days of anonymity before her big reveal.  Here’s a tease:

then

Everything but the floor is changed… for the better, we think.  More on that later, but for now – cheers to us!  Marriage rocks.

Read Full Post »

Out on our evening walk with the pup, we spotted it.  For weeks, we’ve been scouring Craig’s List for a bench.  A simple, dark wood, upholstered bench to fill up a bleak spot between our kitchen and family room.

And there she was.

In our neighbor’s yard, not near the trash can, not near the sidewalk.  Just sitting in the yard.  She was perfect!  Dark wood legs and sides with a seat that looked simple to reupholster (we’d never done that before, but what the heck?).

So, we rang the doorbell, introduced ourselves, and asked, “So… the bench in your front yard… is that lawn furniture?  Did you forget it was there?   Any chance you’re anxious to part with it?”  The answer was great news for new homeowners on a tight budget… “Oh, that’s yours if you want it.”  SCORE!  After chatting with the neighbors a little longer, watching them love on Bowdoin (what dog lover doesn’t love a good snuggle with a bulldog?!), and inviting them to our open house the following week… we snatched up that bench, cut our walk short, and embarked on a quick and EASY DIY project.

then

then

now!

now!

The transformation literally took 30 minutes.  So fast, our pictures are a bit blurry…

we took a paint pen that we already had and touched up a few worn spots...

we took a paint pen that we already had and touched up a few worn spots...

the seat was secured with four screws and super easy to remove...

the seat was secured with four screws and super easy to remove...

the label we spotted when we flipped her over... nice!

the label we spotted when we flipped her over... nice!

We had already purchased two yards of blue fabric that matched our décor at a discount home fabric store.  (It was the end of the bolt, total cost = $6. ) The intention was to use the blue fabric for pillows, but this project only needed one yard – so there’s still plenty left over.

we stapled the fabric to the seat...

we stapled the fabric to the seat...

pulled it taught and maneuvered around the tricky corners...

pulled it taught and maneuvered around the tricky corners...

Moments later…

we popped her back into place...

we popped her back into place...

screwed her back in...

screwed her back in...

and… voila!  A new to us gem!

and… voila! A new to us gem!

This little spot isn’t quite done.  Soon, we’ll put DIY pillows atop the bench and adorn the wall… with… here’s a hint…

yep... we still have a lot of work to do!

yep... we still have a lot of work to do!

Total cost = $3.  (That was the cost of the fabric we used, everything else we already had or was FREE!)

Read Full Post »

Paris in the Dream

Little known fact:  The day we officially closed on our dream, we hopped on a flight to Paris, France.  Crazy, but true.  It wasn’t exactly planned that way, though.

The hubs had a big birthday this year (one with a “0”)… and, as a surprise (that was revealed early so he could get excited… and get time off work…) we went to France to see Le Tour de France and do some sightseeing.

In the weeks leading up to the trip, we started “casually” house-hunting – our mortgage broker and realtor will both laugh OUT LOUD as they read this.  We figured it would take a few months to find the right house, wade through the paperwork and actually seal the deal.  Well, our Dream had other ideas and stumbled into our surprised little laps way earlier than expected.  That meant a rush of wading through paperwork and a deal sealed just in the knick of boarding time.

We were quite relieved and grateful to have Dream keys before our trip.  We could relax and enjoy France!  And we did.  Except there was a lot of Dreaming going on.  And France found a way into the Dream… here’s how:

everywhere you look in france, there are chalkboards

just a sample of the many chalkboards we saw in france

Cafe’s. Restaurants. Bars. Stores. Chalkboards. Are. Everywhere.  We knew one had to come home with us.  It took some searching. (Our suitcases were only so big.) But we did find a chalkboard at a cute home decor store in the last city on our trek, Lyon.

again, good thing we don't write the blog by hand

again, good thing we don't write the blog by hand

She now graces a wall near our kitchen, proudly displaying menu items for the evening – and an occasional love note.

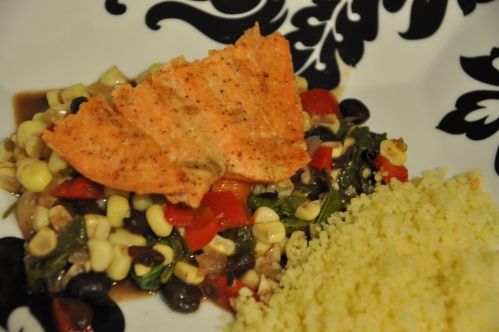
Here’s the dish she advertised on this particular day.

Yumm-o!  (A Rachel Ray 30-min meal fav in our Dream.)

Yumm-o!

(A Rachel Ray 30-min meal fav in our Dream.)

The best part of our trip – the Bourgogne Region.  We spent three fabulous days and two great nights in Beaune – and we can’t wait to go back.  We…

We rented bikes and pedaled through gorgeous vineyards.

rented bikes and pedaled through gorgeous vineyards...

stopped for tastings...

stopped for tastings...

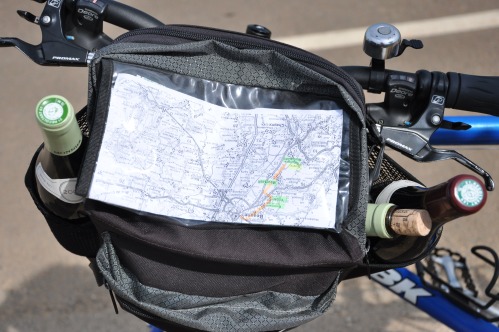
bought bottles and stuffed them in our bike bag...

bought bottles and stuffed them in our bike bag...

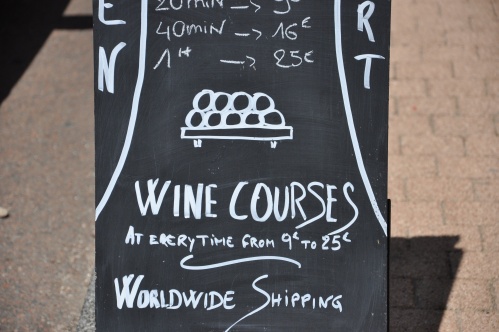
took a wine class...

took a wine class...

and enjoyed the best picnic ever.

and enjoyed the best picnic ever.

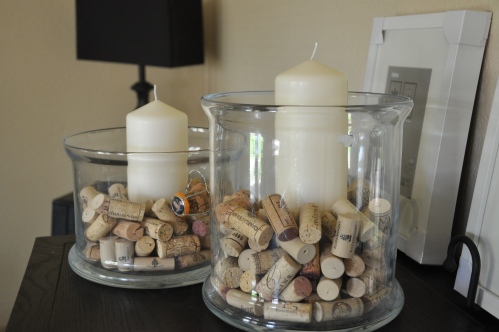
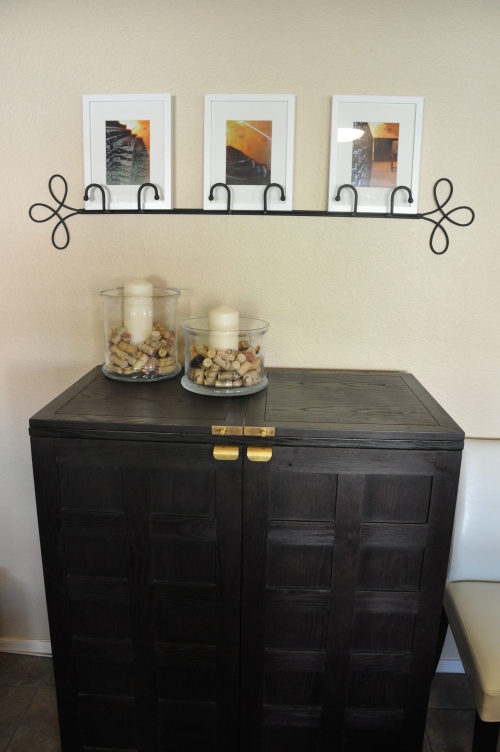
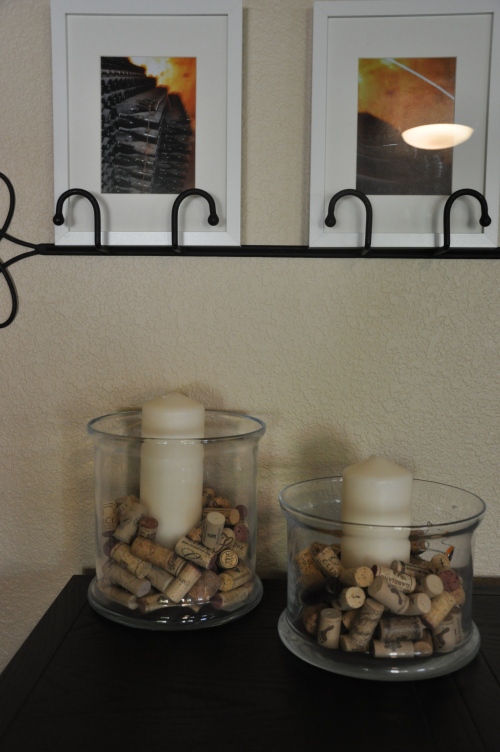
One thing we noticed in that area is that no cork went to waste.  Each wine shop/store/tasting room had huge decanters filled with corks.  As mentioned in an earlier post…  We’d been saving wine corks and collecting them from family for a while. So, we were ready to implement this French aesthetic into our dream.

cork and candle filled apothecary jars

cork and candle filled apothecary jars

The candles are from Ikea.  The jars were wedding gifts – something I apparently couldn’t live without while registering.  The candles are the same size.  The jars are not.  So, I had to get a little creative to mask the height issue…

if you can't even remember why you purchased a certain canned food item, much less when, it's probably not safe to eat anyway (even if it is canned)

if you can't even remember why you purchased a certain canned food item, much less when, it's probably not safe to eat anyway (even if it is canned)

Now, with that little dilemma solved, what better place to place our corky creation then atop our bar?

one could say they're kind of like cork trash cans, but classy cork trash cans

one could say they're kind of like cork trash cans, but classy cork trash cans

Let’s take a moment to admire the bar, shall we?  We are quite proud of this particular piece.  It is the Crate and Barrel Steamer Bar Cabinet.  We had our eye on this sucker for a long time.  Her price tag, however, meant she was only attainable in our dreams.   Then, one day, EUREKA! Our faithful, daily Craig’s List search plopped her on our screen — at less than half the cost of retail.  YES!!!  We scrambled, got oursleves to an ATM, took our cash down to a shady storage unit, and did a happy dance.  I mean, just look at her…
and she's on wheels - so we can swing her into a different room for a party if we're feeling sassy like that

and she's on wheels - so we can swing her into a different room for a party if we're feeling sassy like that

So, what better to top off a bar then a creative use of corks?  Let’s just take one more look…
hmm... anything else catching the eye?

hmm... anything else catching the eye?

Ahh, yes, the photos.   More from France!  The trio of pictures above the corky candles, which are above the bar continues the libation theme.  We’re simple people.  We like to keep things orderly.
champagne cellar shots from reims, france

champagne cellar shots from reims, france

We took these photos while on a tour of the Veuve Clicquot champagne cellars (a tour we highly recommend — but you must book one month in advance!).  Veuve Clicquot is our favorite champagne and it was fun to incorporate these kinda funky shots – and fabulous memory into the room.  Speaking of memories…
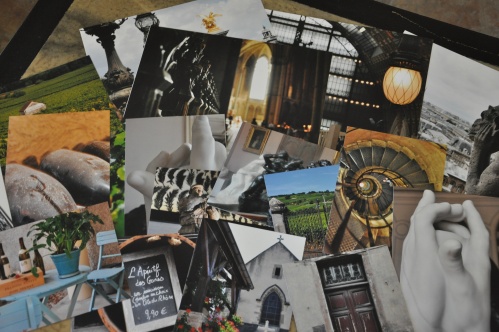
We came back from our trip with 1,300 pictures!  (Can you say, "shutterbugs?")

we came back from our trip with 1,300 pictures! (can you say, "shutterbugs?")

So… those memories will grace our walls soon.  Stay tuned!
We are just days away from a BIG reveal — Then & Now photos of our kitchen.  We are so excited to show you.  Just two more things to do… wish us luck!

Read Full Post »

As we’ve said previously, we are focusing our efforts on the common areas of our dream.  That means the kitchen and family room are getting a lot of love right now.  The dining and living rooms must be incredibly jealous.

Our kitchen and family room adjoin — so they’re basically one big room.  And that’s exactly what we want it to feel like.  However, as you’ll see in future posts, the kitchen is light and bright, the family room is more subdued with darker colors.  We needed to tie it all together somehow — and fabric is the answer.  Fabric for valances, dish towels, table runners, placemats, napkins, aprons, pillows, drape panels, quilt, stretched frames, shower curtain, bed spread… uhh… now we’re getting a little carried away.  Okay, just a nice fabric that we could put in key spots (without overdoing it) to tie the two rooms together.  In Style magazine June 2008 gave me the perfect answer:

Schumaker's Chiang Ming Dragon

Schumaker's Chiang Mai Dragon

She’s gorgeous!  I heart her.  She is so out of my league.  This was from a spread on actress Kristen Bell’s house.  A quick Google search prooved that this fabric is so fab, everyone is dreaming about it.  Your best chance of getting it is to stalk Ebay like a drunk ex-girlfriend e-stalking her former lover.  Not happenin’.  I am happily married, thank you.

So, with ripped out magazine photo’s in tow, I set out fabric searching with a pro:

Mom.

Mom.

After measuring (thrice!) our three target windows,

This montrosity is 5'x6'!

This montrosity is 6'x5'!

We set out on quite the trek.   My mom is an artist, not prone to organizational skills.  However, she proved me wrong (and spoke my language) on this day.  Bringing with her an intinary:

On the list: six home fabric stores!
First, we gotta fuel up for the day…

In all, we visited seven fabric stores that day and literally saw thousands of options.

So many options...

Where do you start?

One of these made the short list... can you spot it?

One of these made the short list... can you spot it?

Having Chiang Mai Dragon in mind helped tremendously.  We were able to whip in (and out) of many of those stores fast if I didn’t see something close to my beloved unattainable dream fabric. By the end of day one of fabric searching, I took home two samples.  (Both from the first store. Cue: rolling of the eyes.)

Option 1

Option 1

Option 2

Option 2

The samples from these two beauties sat taped to our dream’s walls for a week.  Something was not quite right.  Option #2 was too dark for the light and bright kitchen.  Option #1 was too white for the darker and subdued family room.  So, I set out again – venturing to three more fabric stores.  At the last stop, store #10, I spotted her.  It was love at first sight.

EHarmony couldn't have matched this better.

e-Harmony couldn't have matched this better.

And there she is.  No dragons are involved, but she is sassy and classy.  (And very “Pottery Barn” – I do a double take every time I see a photo of PB’s Deirdre design.)  We love her.  Even better, she was on sale — 20% off, and she was a housewarming gift.  So, now 13 yards of this free-to-us fabric dream sits rolled up in the corner.  Ready to be transformed into 3 valances, several pillows, 1 table runner, 1 shower curtain and many future blog posts.

Read Full Post »

Older Posts »